

including stars in your landscapes
Len describes how to add stars to your photographs with some tips on astrophotography.
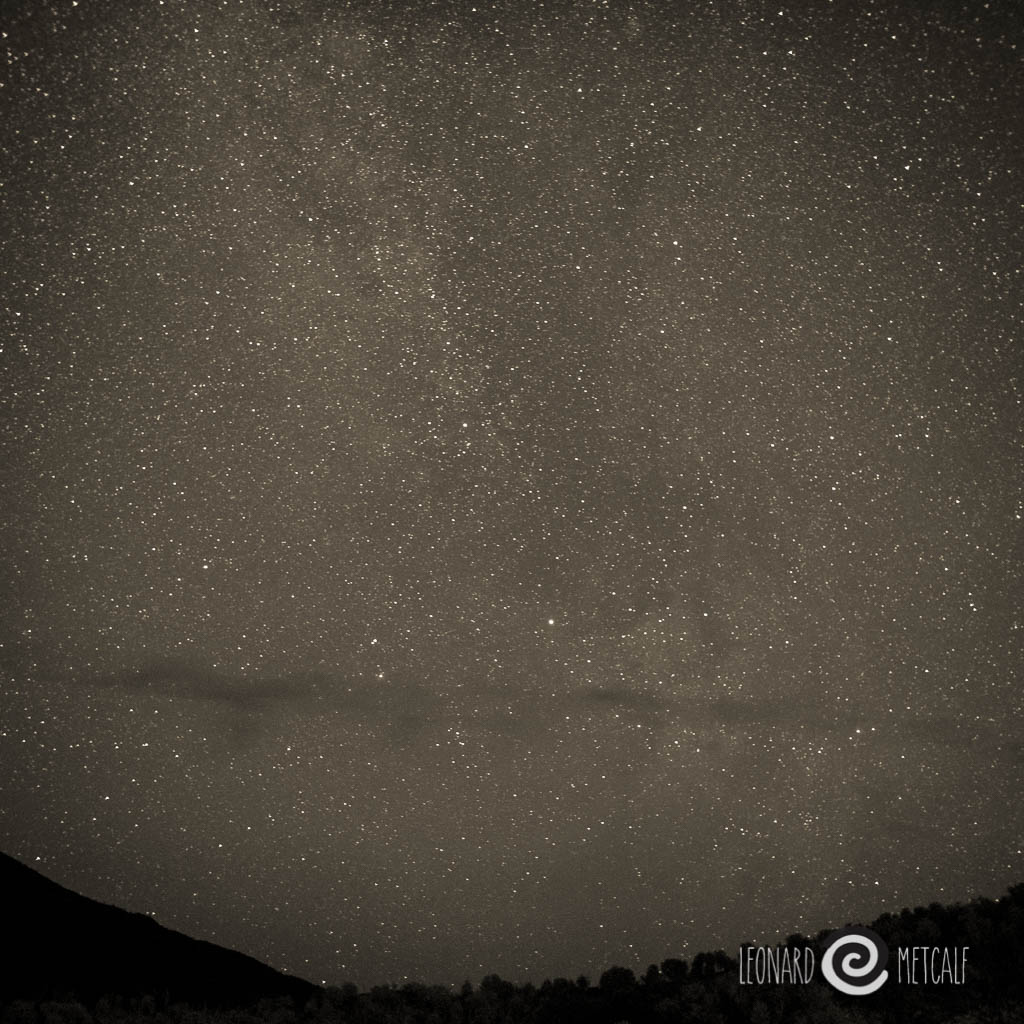
Arkaroola Starry Night - The Gammon Ranges / Flinders Ranges, South Australia
Astrophotography is taking photographs at night. In this short set of notes we will look at getting acceptably sharp stars in our photographs using the 500 rule. We will be limited by your equipment and locations. Firstly you need to be somewhere away from cities and bright lights. Much like the places they build observatories. The city lights reduce our ability to see the stars as they reflect off the atmosphere reducing the amount of light that gets through, which effectively reduces the amount of stars in our photographs. So go bush dear friends, and find a clear night sky.
Next you will need a fast lens. F1.2 to f1.4 will work best. You may get away with a f 2.8 lens. Any slower and this won't work. Don't have an f 1.4 lens yet? Why not, for their price they are one of the most important lenses in your kit. They are sharp, fast and relatively cheap. Go for a standard one. 50 mm equivalent on 35 mm is the one recommend and is my personal favourite. It was always the lens they used to see with a film slr before zooms became popular. There is a reason for this, and that is they are cheap to make and have outstanding performance. They also can be made to look wide angle and telephoto in skillful hands. For the last three years I lived with one lens, and a 50 mm equivalent was it. I can frame my shot without a camera for this lens now. An amazing thing that helps me take great photographs.
You camera needs a few characteristics too. Firstly you need to be able to shoot at 15 - 30 seconds. Sometimes you may need to go past a minute. Secondly you need a camera that works well at higher ISO's, in the 1000 to 6400 range. Lastly you need a tripod and a way to fire the camera without introducing vibration. If you have an SLR you will need to lock the mirror up and use a cable release. With mirrorless cameras you can just use a delay. I use the two second one, but I do have a very solid tripod designed for a very heavy large format camera, so my camera is very solid on it.
To focus your camera just focus on infinity. Close enough to those stars I suspect ;)
Shoot RAW and worry about white balance latter. Put your long exposure noise reduction on or set to auto. This will take longer when you as now your camera will take a second photograph of blackness with the shutter closed after your first photograph, and subtract the hot white pixels from your original exposure. This is called a dark frame subtraction and reduces noise in your final image. Well worth the wait in my opinion.
The way to figure out exposure is by trial and error. So I just dial in the following settings, take one photograph and then adjust my settings for optimum picture quality. I like to bring my ISO down to keep the noise low.
I would start with a 10 second exposure at f 1.4 at 3600 ISO
When considering exposure I like my night photographs to look like night, so I often drop the exposure to make them a little darker. I prefer to do this post processing though. You will also need to consider the moon and this will effect your final exposure.
To figure out what the longest shutter speed you can use with your lens use the '500 rule'.
500 divided by focal length in 35mm equivalent = maximum shutter speed in seconds for sharp stars.
So with my 25 mm lens on my micro four thirds camera is a 50 mm equivalent.
500 / 50 = 10 seconds
Now you can hopefully see how I determined my exposure.
The wider the lens the longer you will have.
Go and practice. Lots experiments the next time you get away from the city.

learn to drive a camera in manual
A quick overview extolling the benefits of manual control of your camera and exposures.

Ghost gum, Ormiston Gorge, MacDonell Ranges, Central Australia © Len Metcalf 2015
I was lucky when it came to learning to use a camera. Firstly I was so young I don't really even remember learning. Secondly I learnt to drive a manual camera. An Olympus OM-1. No autofocus or auto metering. Actually at the time it was a ground breaking camera, for it had it's small size on its side. It did have one thing and that was an internal light meter. The middle area of the frame was the area that the camera took the light reading from. The same as center weighted metering on your camera today. I can remember longing for the titanium spot metering model, the Olympus OM-4Ti spot. What ever I pointed the center at would turn mid tone in the final image. Learning how this worked was a start in my learning journey. Later in life I moved to fully manual cameras. Ones with no light meters, no electronics, focusing is done on a ground glass, or by distance scales. To figure out the exposures I used external light meters. Initially it was a Western Zone meter IV. It ran from a photovoltaic cell. No batteries. I could put a white dome on it to take incident readings. Latter came electronic light meters, a Pentax spot (I used an analogue model and a digital zone modified one) and a tiny pocket incident meter.
Learning to calculate the exposure with these tools was a valuable lesson that pays off in difficult exposure situations. While I don't advocate going to the extreme of using an external light meter (though there would be a great deal of benefit from doing so). I do suggest you learn to use your camera in manual mode. It will be a useful exercise in getting the most out of your camera. I recommend you put your camera in manual and keep it there until you can use it without thinking. That means keeping it there for the next month or five, not just the next shoot.
With black and white negative film the exposure determines where the blacks and dark tones fall, while the development time determines the highlights. Most will just worry about where they want shadow detail to appear in their photographs and use that to calculate their exposure.
Digital has its own similar quirks. The details are in the highlights with digital cameras. There is more information in the highlights. The point where the highlights change to white is a very important point. Either you have information in your highlights or they are overexposed and nothing can be done to recover them. This has lead to the popularization of Expose To The Right (ETTR). By using this technique you can end up with a cleaner photograph, particularly in the shadows.
To use ETTR set your exposure so the the histogram starts perfectly on the right hand side, exactly from the corner. The resulting photograph should not have any clipped highlights and will probably appear too light when reviewing it. Latter you can alter the exposure in post processing to give it the look you are after. ETTR is an advanced skill and is better tackled later in your learning journey if you are a beginner.
Now you have your goal in terms of what a good exposure looks like. You can now adjust your three variables to help you get there. The three variables are ISO, shutter speed and aperture.
Now that you can can control your camera without thinking, you can use your histogram to judge exposure. I use the histogram to judge exposure all the time. I leave it on in my viewfinder all the time, so I can see what the effects of my exposure adjustments are doing in live time. You can only do this with cameras that have electronic viewfinders. Otherwise you will need to chimp your histograms on the screen on the back. Some cameras allow you to set exactly at what tone the end of the histogram starts at. I drop mine by three units to give myself a little leeway.
Some of us think that this would be a good addition to modern cameras, a setting for exposure that sets exposure exactly for ETTR, as this would be a very easy bit of programming and would give many of us some huge benefits.

using a framing device
Framing devices are used by professionals to help them.
A framing device is a very useful tool in improving your photography. It has been used by artists long before photography came onto the scene. It is helpful for pre-visualizing the final photograph.
For those who use a standard format sensor in the 2 x 3 ratio the best and simplest framing device is an old slide. The plastic ones with white on one side and black on the other make the most fantastic light weight framing devices. We should put them on a neck chain and wear them. As now that they are retro, they would look fantastic...
To use one is simple. Choose the white or black side for your scene. If your shooting in a dark environment choose the white side. If your out in bright conditions the black side is going to be more effective.
Now hold it up to your eye and look around at the world and start taking photographs in your minds eye. Hold it parallel to your eye ball (perpendicular to your line of sight). Hold it 5 centimetres from your eye. If you do this, you now have the equivalent of a 50 mm full frame lens on your camera. Move it out to 10 cm and now you have a 100mm full frame equivalent on your camera. Move it in to 2.4 cm and you have your wide angle 24mm full frame equivalent.
Too easy..
Now practice and practice and practice framing up your photographs in your mind. Notice how that when you move the photograph is going to change. Move closer to your subject, move up or down and reposition objects so that they make a balanced composition. How do you know it is balanced, well you decide by your feelings. Let your intuition guide you.
Don't have a 35mm slide. Well you can make these out of cardboard.

light painting the figure
Painting in figures with a torch during long exposures is one of Len's favorite techniques. Here he describes how he does it. Go on try it tonight.
Our last photograph before finishing. The light had almost gone, so I added some more with a torch, as described bellow, painting around her so that it was soft and not directional. From our book ‘ Our love affair with trees.’ that I am co authoring with Jodi Rose.
Lightpainting the nude figure is fun and gives us the most beautiful results. The light can be shaped in ways that no other technique can replicate. With minimal equipment and a little practice stunning results can quickly be achieved. Equipment considerations
Camera that you can set on 60 second exposures or on bulb
Sturdy tripod
Torch - the choice of torch is important. Recently I have settled on LED torches and have fallen in love with a LED Lenser (P6)
Willing model & suitable model release
Before running out the door with all of these things I do recommend having a quick look at the weather and the outdoor temperature. Here in Sydney it is really only warm enough to do this in the summer months (Nov - March).
The other thing to consider is the location. Obviously somewhere quiet without onlookers is a serious consideration. The other thing to look for is solid objects to lean the model against. Have a look in the following photograph. Her head is propped against the tree as is most of her body. This keeps her still for the minute exposure. I do a verbal count down so that the model knows when to start being still and so they can hold their breath for the whole exposure. I also tell them when it is over so they can relax & breath again.
Before we get to taking the image the first thing you need to consider is the exposure. I like to use a sixty second exposure as this gives me plenty of time to work with the torch. I always set my ISO as low as possible, my current camera only goes to 200 ISO so that is what I use. The next step is to play with the aperture to get enough of an exposure in your background. I have been finding f 5.6 seems to work for me and I use that as a starting point. I put my camera in manual and then take an exposure (60 seconds @ f5.6) and then have a look.
If your camera at this point seems to be taking a long time before you can view the image this is because you have long exposure noise reduction on and your camera is taking a second exposure of the blackness (with its shutter closed) and subtracting the hot (white) pixels from the original photograph. This is called a dark frame subtraction. Despite this being inconvenient it is a good thing as it reduces noise in your final photograph so I recommend leaving it on. Most cameras have this default set to start on exposures after 1 second.
While determining the exposure I need to consider the final look. I like my night photographs to look like they were taken at night, so I tend to under expose them so there is a lot of black so they look quiet dark. This is my personal preference. If you want a darker image stop down your lens to f 8 or f 16. If you want a brighter photograph open up your lens to f4 or f2.8. If f5.6 is your widest aperture then you can always increase your ISO. Try doubling it.
The wind blows gently and moves the fabric to soften this part of the photograph.
Now we are ready for our model. To keep your model warm keep them clothed and start working on your composition, the models pose and light painting. I figure out what it will look like before you do a nude version. Sometimes these test photographs are so good that you may not go any further. The following photograph is an example of one of these tests.
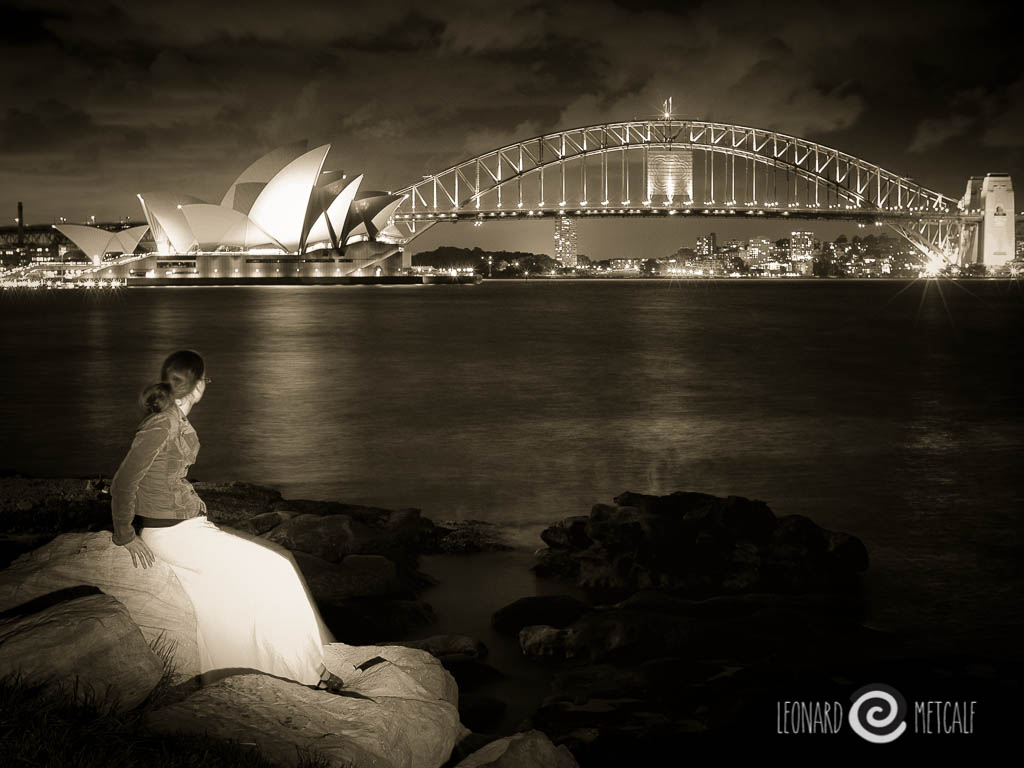
Mea Culpa & Sydney, I love this image even though It was a test / practice shot and it has now made its way into my catalogue © Leonard Metcalf 2011
Now you need to figure out your torch exposure. This is simpler than you would imagine. I start with a 30 second exposure. I walk around behind the camera painting my subject with light from about ten metres. I work evenly on both sides of my camera (left and right) and vertically as well. By doing this I get a very soft light that wraps around the figure.
The last 30 seconds of my exposure I use to add extra light to the foreground and to any of the other objects in the composition (like the tree in the first photograph in this article.
The rules:
once you get your background exposure correct don't change it
if the figure is too bright, reduce the amount of light on it - you do this by reducing how long you shine your torch on the model
if the figure is too dark, increase the amount of light on it - shine the light on the model for longer
if you move closer to the subject with your torch you are increasing the amount of light on the subject
if you move further away from the subject with your torch you are decreasing the amount of light on the subject
initially stay the same distance away from your subjects to remove this variable
practice, practice, practice - "Practice does not make perfect. Perfect practice makes perfect" - Vince Lombardi ;)
It is inevitable that your subject will move during this process. It is part of the process and needs to be embraced. Have a really close look at my examples and you will see the delightful movement in the figures. I think they really add to the technique.
Our yellow wiggle poses with a giant fig. Shorter exposures mean their is less movement with the subject.
Light painting is a slow and laborious exercise that creates amazing results. I have found that in a three hour session we might only create 12 images and only one or two worthwhile ones. Despite this it is well worth the effort. Keep an eye on your model and keep them warm, with hot drinks & sugar and rug them up between images. If they get too cold it is time to go home.